View in gallery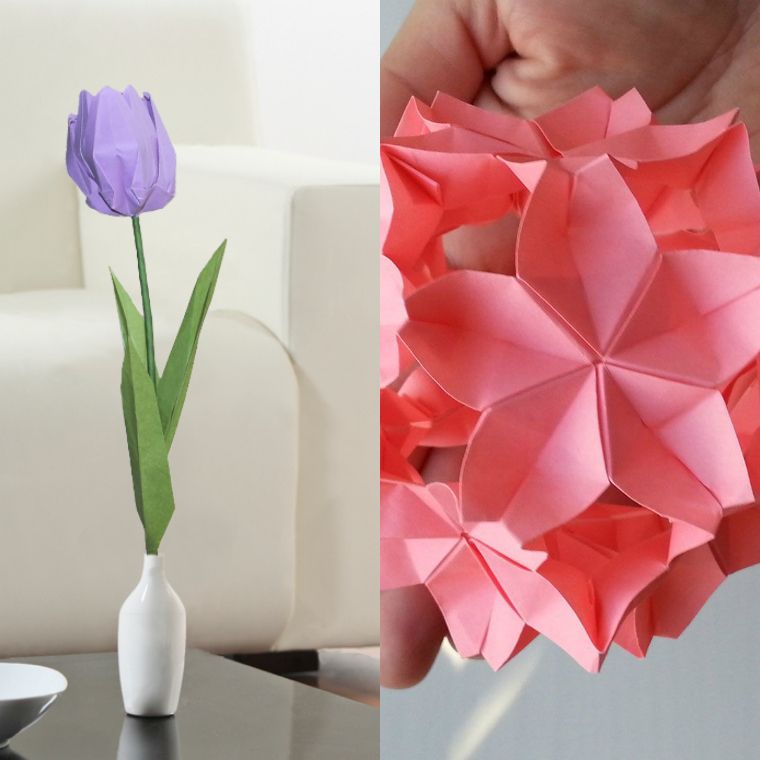 Origami flower, Japanese art is at the service of DIY floral deco! | 1/21
Origami is an ancient Japanese art that allows us to make various objects in paper. In its classic version, origami does not allow the use of scissors, glue and other similar instruments.
The objective of the game is to show his skill in paper folding and to realize DIY entirely natural decorations. After our tutorial that featured easy paper folding ideas,
we are turning to flower origami today.
As we know, the Japanese are great lovers of the beauty of nature and, more particularly, flowers. For this reason, they have developed several paper folding techniques in the form of flowers. We are looking at 3 that show how to make a blooming flower, a tulip and a camellia.
Blooming flower origami
View in gallery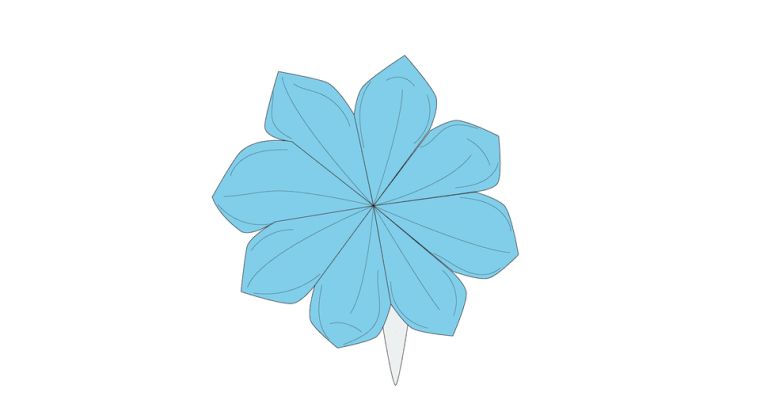 Origami flower, Japanese art is at the service of DIY floral deco! | 2/21
This flower origami tutorial guides us through the 8 steps of making a flourishing flower. This is a classic motif from the Japanese tradition that has a characteristic 8-petal shape. The paper flowers thus produced can serve as floral decoration of the house but also for the DIY wedding deco and, why not, to complete a groom’s outfit. To make an origami flower of this type, you will need a sheet of paper size 15 cm x 15 cm.
Tuto origami flourishing flower
View in gallery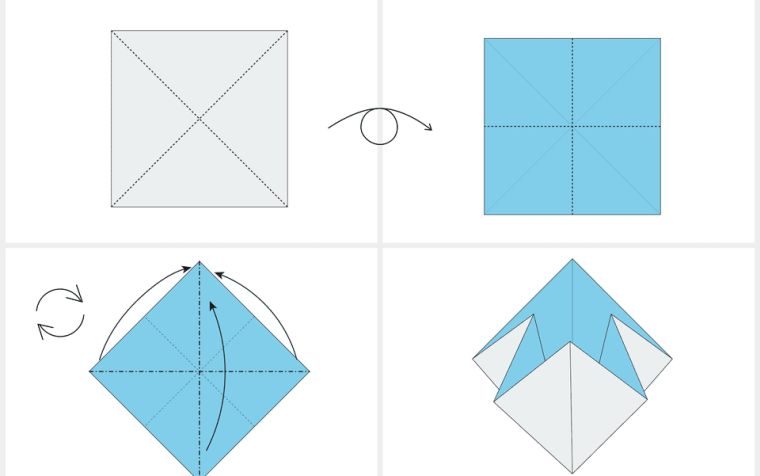 Origami flower, Japanese art is at the service of DIY floral deco! | 3/21
The first step in this flourishing flower origami tutorial is to fold the paper half diagonally in both directions. An X is thus obtained in the middle of the sheet. Then, turn the sheet on the other side and fold the paper in the middle, from top to bottom, then from right to left before unfolding. To finish with this step, we turn the paper and bring the angles together, as shown in the picture above.
View in gallery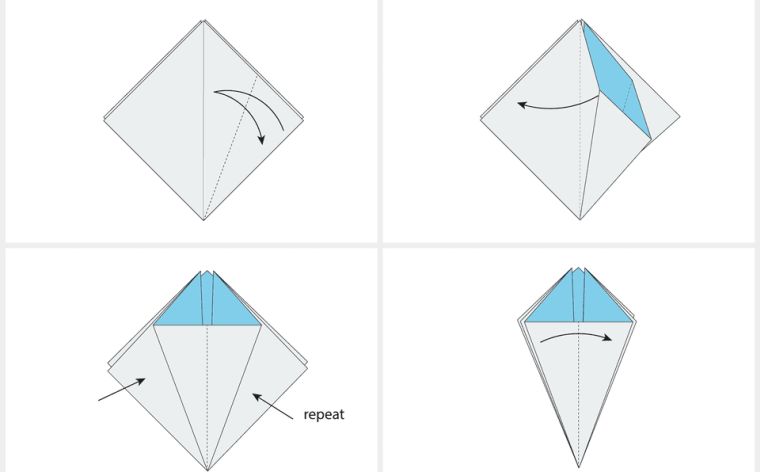 Origami flower, Japanese art is at the service of DIY floral deco! | 4/21
For the second step of the tutorial, press the paper on its work plan. Then open some of the paper and turn to the side, as shown in the picture above. This procedure is repeated on all 4 sides of the sheet. Finally, fold and enclose the pieces of paper. A shape similar to that of a diamond is thus obtained.
View in gallery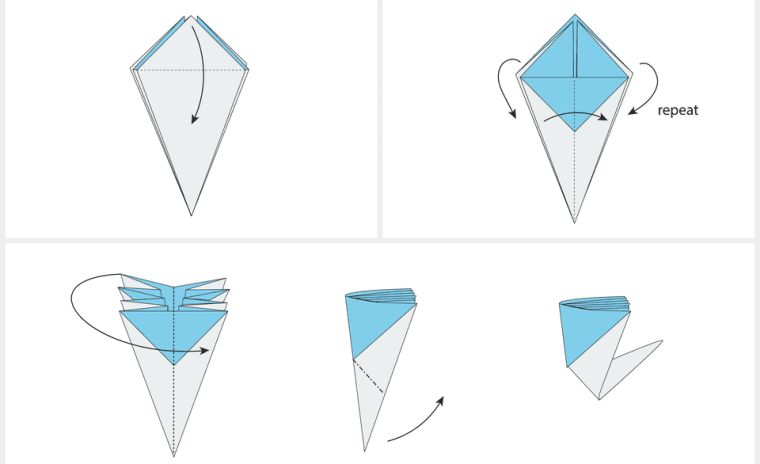 Origami flower, Japanese art is at the service of DIY floral deco! | 5/21
At this point, a portion of the top section of the paper is folded down. This procedure is then repeated with all the ends of the same section. Then, fold the left part to the right, then fold again diagonally.
View in gallery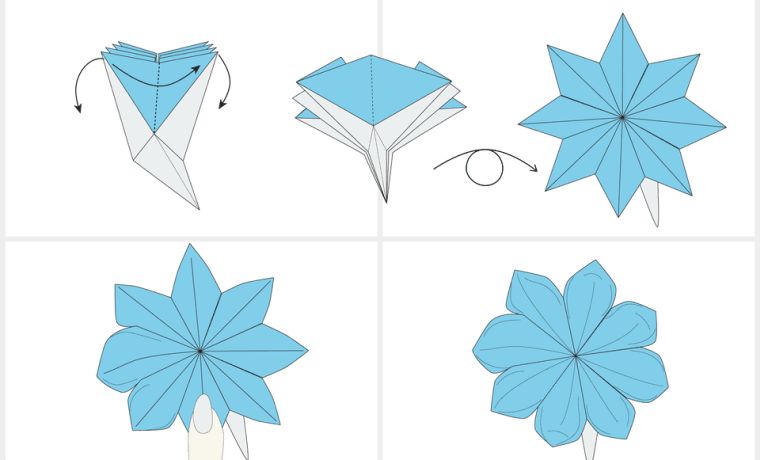 Origami flower, Japanese art is at the service of DIY floral deco! | 6/21
Finally, we turn the paper slightly to the right and open the petals of the origami flower. The image at the top shows the result.
View in gallery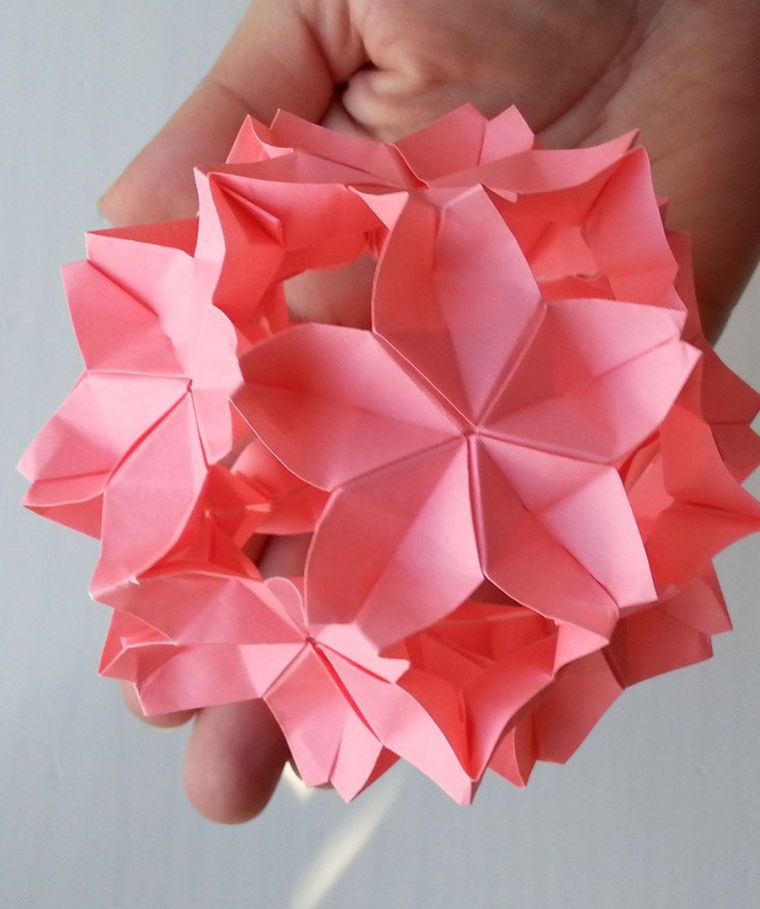 Origami flower, Japanese art is at the service of DIY floral deco! | 7/21
Easy Flower Origami – Paper Tulip Folding
View in gallery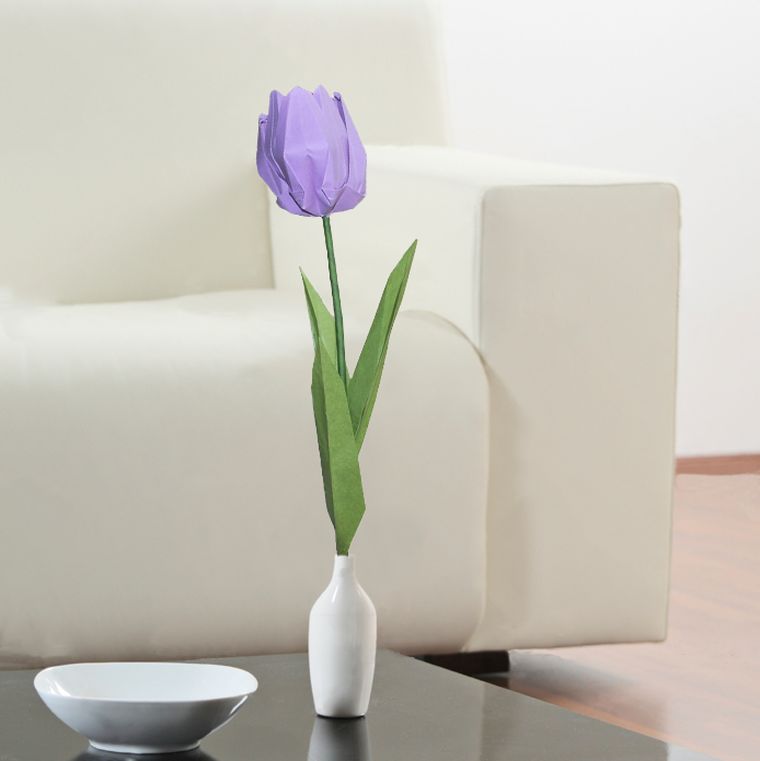 Origami flower, Japanese art is at the service of DIY floral deco! | 8/21
Making a paper tulip is a great way to create a spring or Easter decoration. This easy origami tutorial shows how to make a success of such a project. As the paper tulip has petals and a stem, you will need two identical sheets to make it.
Simple tulip flower origami tutorial – how to make the petals
View in gallery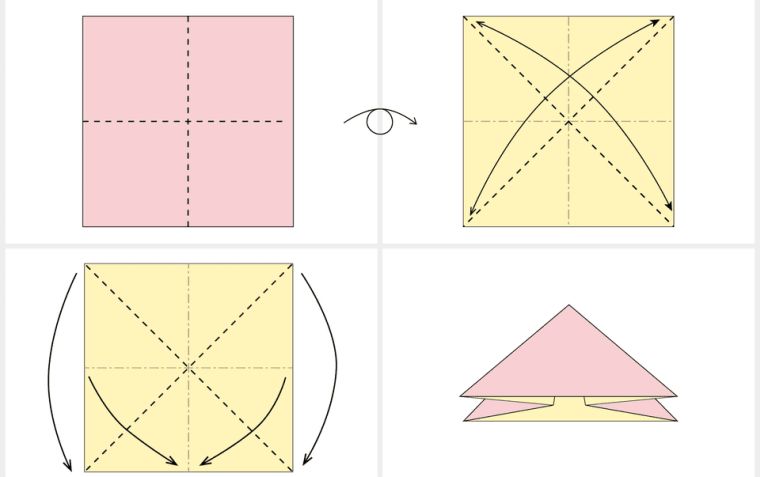 Origami flower, Japanese art is at the service of DIY floral deco! | 9/21
For the first step of this tutorial, we start by folding the paper halfway, from top to bottom and from right to left. We unfold and return the paper on the other side. The same procedure is repeated on this side of the sheet. Before proceeding to the next step, fold the sheet from top to bottom, pushing the edges towards the middle.
View in gallery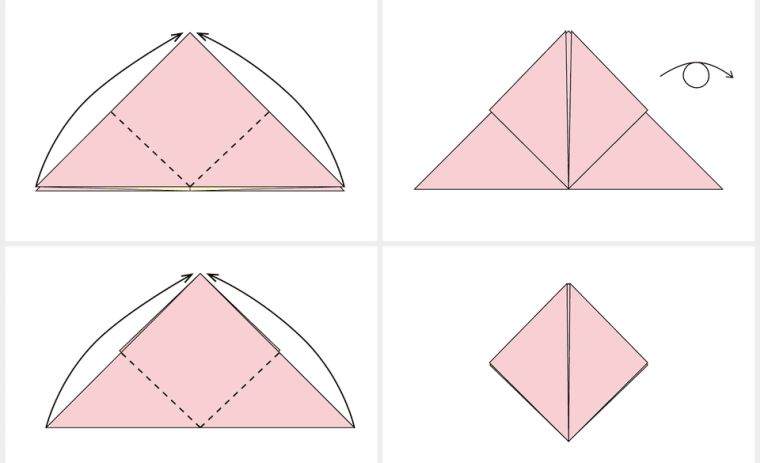
Origami flower, Japanese art is at the service of DIY floral deco! | 10/21
With the triangle thus obtained, the left and right ends are folded upwards, then the paper is turned to the side. The same procedure is repeated on this side to obtain a kind of small square.
View in gallery Origami flower, Japanese art is at the service of DIY floral deco! | 11/21
For the next step, take the square and bend the right section to the left. We return the paper and repeat the procedure on the other side. Then we turn the paper over again and fold. Finally, we bend the right edges, as shown in the picture above.
View in gallery Origami flower, Japanese art is at the service of DIY floral deco! | 12/21
In the next part of the tutorial, repeat this procedure on the other section of the paper. Then slide the flap on the left inside the one on the right. We return the paper and repeat these steps. Finally, fold the section from the bottom to the top.
View in gallery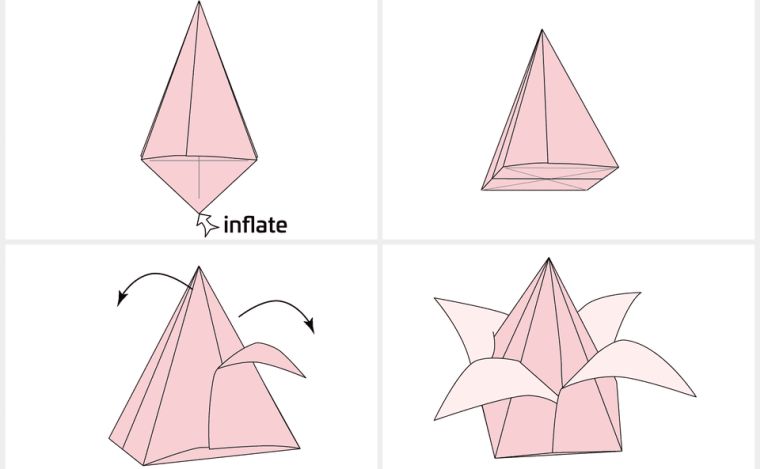 Origami flower, Japanese art is at the service of DIY floral deco! | 13/21
During the last step of this origami flower tutorial, it is up to us to shape the flower. The image at the top shows how to proceed to give it more volume.
Simple tulip flower origami – how to make the stem
View in gallery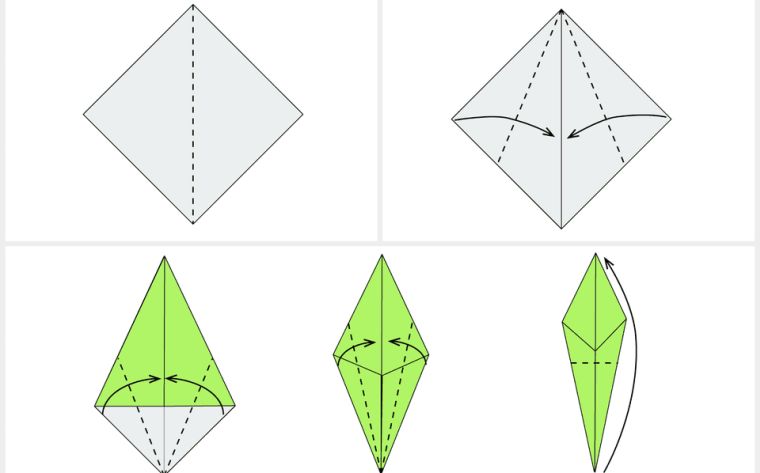 Origami flower, Japanese art is at the service of DIY floral deco! | 14/21
After finishing with the making of the petals of the origami flower, we move to the realization of the stem. For this, we use a sheet of paper of the same size. We begin by folding the paper diagonally and unfold. Then we bring the right and left sections back to the middle. At this point, fold the bottom edges, right and left, to the middle and repeat this procedure twice. Finally, the end of the rod is bent upwards.
View in gallery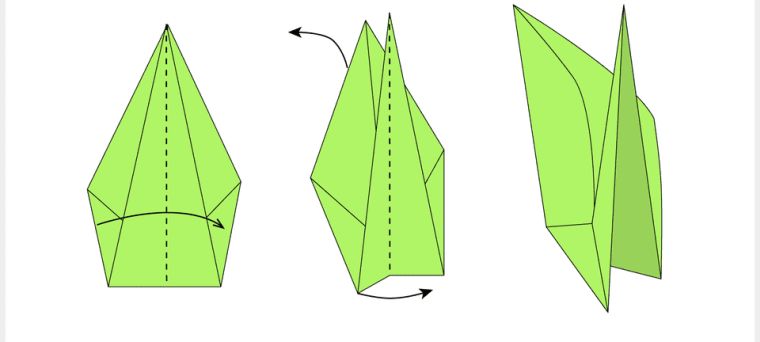 Origami flower, Japanese art is at the service of DIY floral deco! | 15/21
We are now coming to the last stage of the project. It consists of bending the shape obtained in the middle and unfolding the sheets obtained. The instructions at the top illustrate how to complete this last stage of rod manufacturing.
Easy camellia flower origami
View in gallery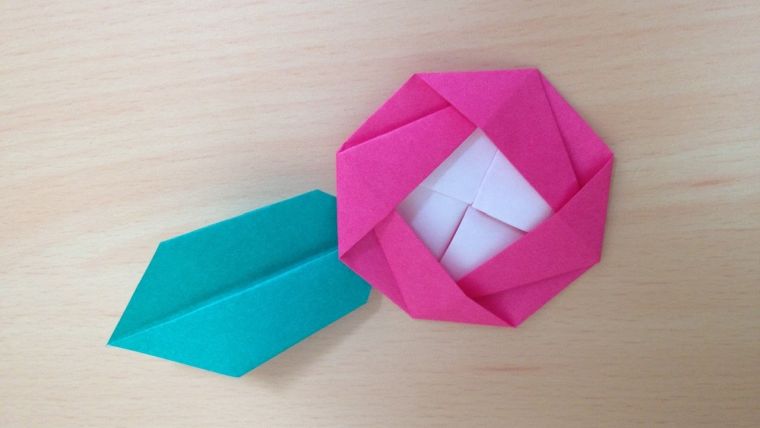 Origami flower, Japanese art is at the service of DIY floral deco! | 16/21
Camellias are typical flowers of Asia. Because of this, their shape has inspired origami flower making tutorials, like the one we share with you below. Use it to decorate your home with these paper flowers that represent love (red color), waiting (white color) and desire (yellow color)!
Camellia flower origami paper tutorial
View in gallery Origami flower, Japanese art is at the service of DIY floral deco! | 17/21
To prepare the base of the paper origami flower, fold the sheet to obtain an X, then form triangles, as shown above.
View in gallery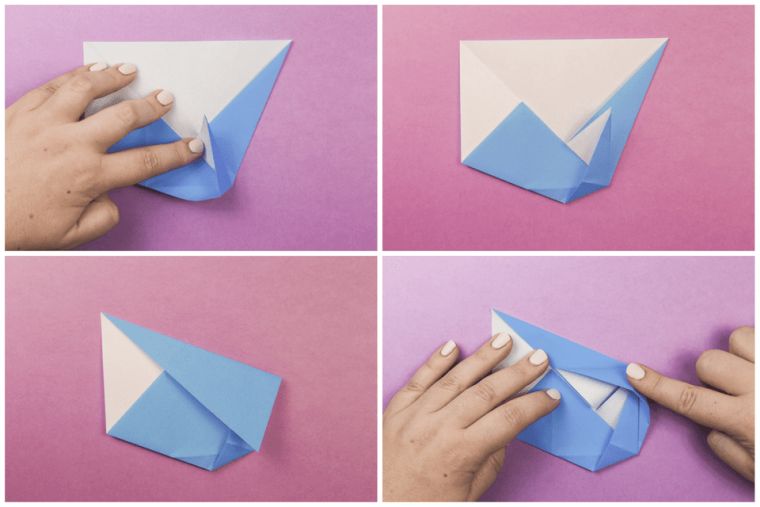 Origami flower, Japanese art is at the service of DIY floral deco! | 18/21
View in gallery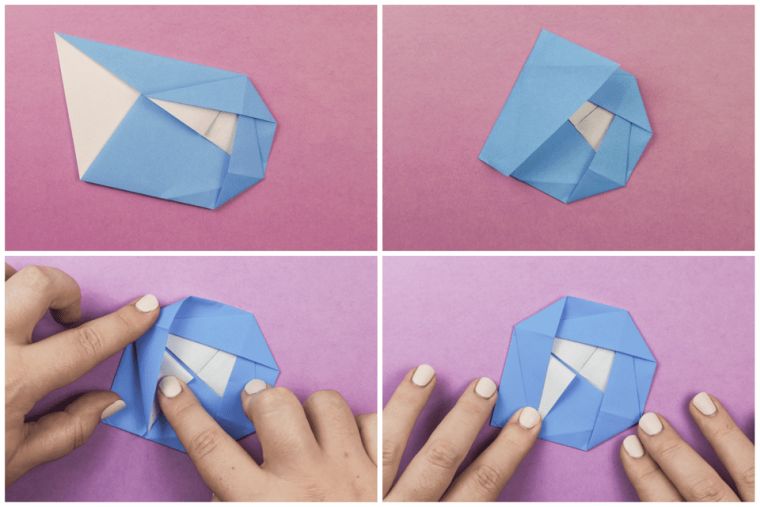 Origami flower, Japanese art is at the service of DIY floral deco! | 19/21
Continue with this procedure on all sides of the sheet. At the same time, we slightly unfold the ends and we slide a part of each triangle in the previous one.
View in gallery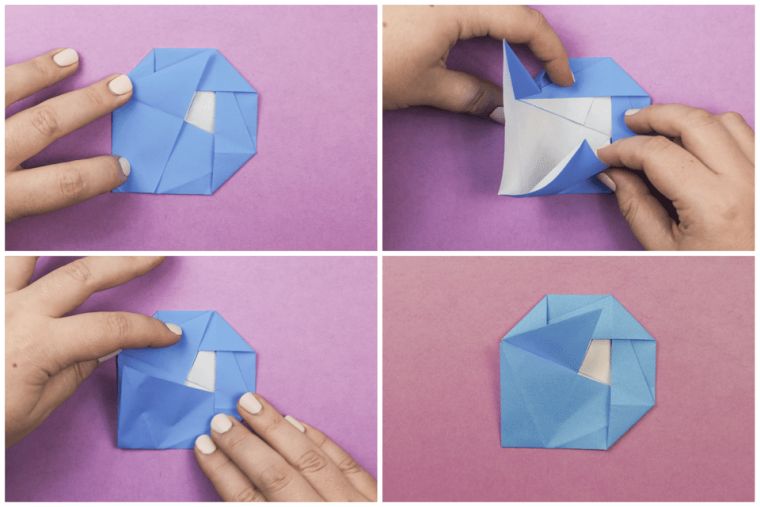 Origami flower, Japanese art is at the service of DIY floral deco! | 20/21
After finishing with all the sections of the sheet, we open slightly the part of the left and we exchange the functions of the flaps of this part. The bottom section should rest on the top section.
Finally, all that remains is to fashion the origami flower in the shape of a camellia. For this, we use the edges of the triangles that unfold slightly to slide them in the sections to side. The instructions at the bottom show how to do this last step.
View in gallery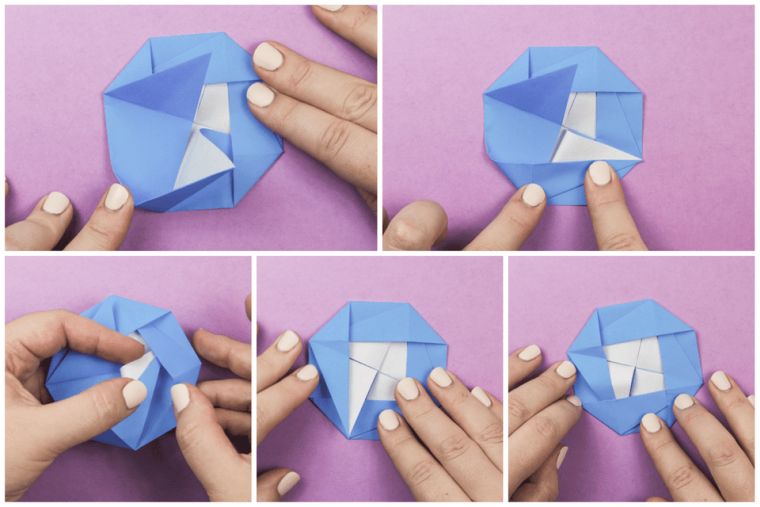 Origami flower, Japanese art is at the service of DIY floral deco! | 21/21
Claire Deschamps in