View in gallery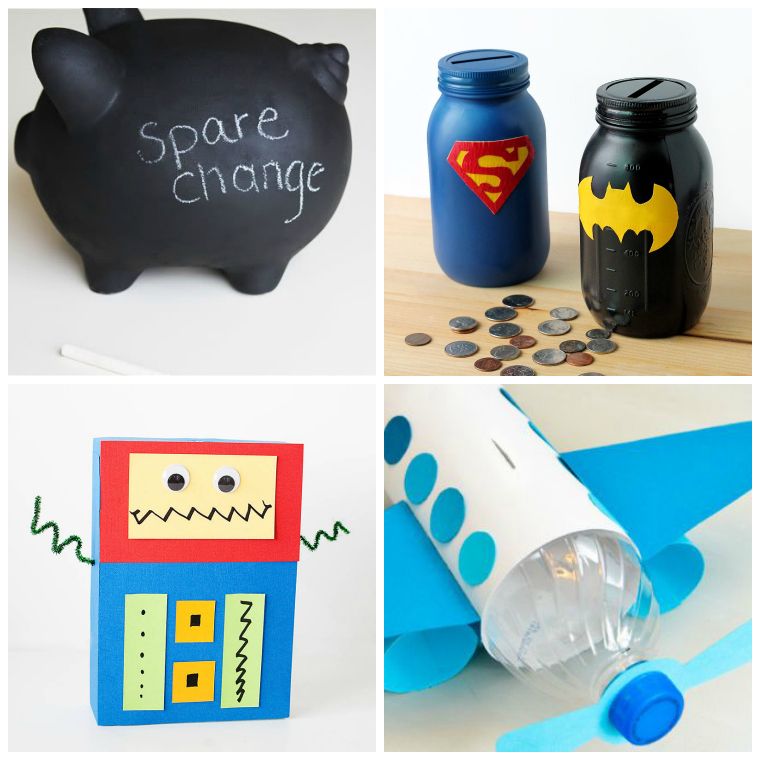 Making an original piggy bank is easy and fun with these 5 projects! | 1/28
Summer is a good time to discover creative outdoor recreation. But when the heat outside becomes too intense, we turn to the freshness of our homes.
During these times of the day, many parents offer ideas for manual activities to their children. It’s a way of entertaining them inside the house, while teaching them how to make various objects for the decoration of the children’s room. Today, we are interested in this type of creative projects. We decided to talk about
original piggy bank manufacturing projects,
since this nice object also has the advantage of teaching little ones how to collect money to invest in a gift or an activity that makes them dream. The months of June to September are precisely a period during which children and teens are free to imagine activities that can bring them a little money next door. And what better than an original piggy bank to keep it safe from curious eyes?
Piggy bank pig painted in slate color
View in gallery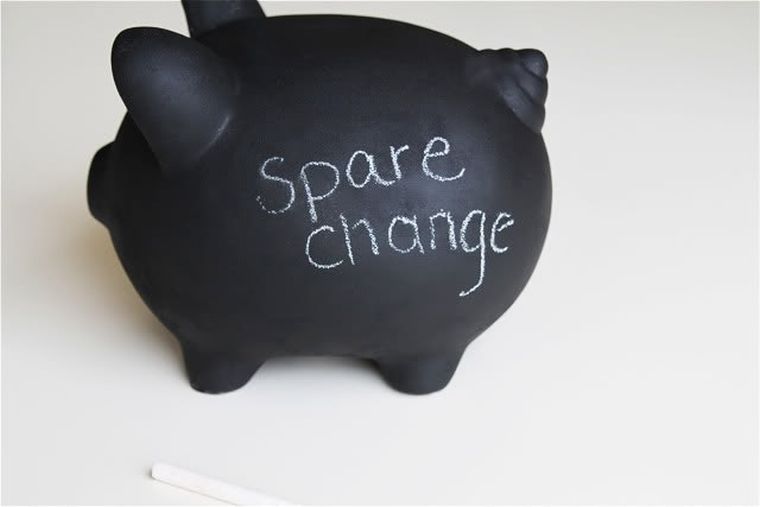 Making an original piggy bank is easy and fun with these 5 projects! | 2/28
We start with a fairly simple manual activity project. It involves repainting a piggy bank that is already on hand to give it a more trendy and fun look. The materials that will be needed for this original piggy bank idea are:
- an old piggy bank;
- slate paint;
- brushes or a paint pad;
- chalk to decorate the piggy bank (optional).
View in gallery Making an original piggy bank is easy and fun with these 5 projects! | 3/28
The first step in this project is to prepare the work surface. If the piggy bank we are going to use is an old and dusty object, we clean it with a little soapy water and a rag. Let it dry before tackling the next step.
View in gallery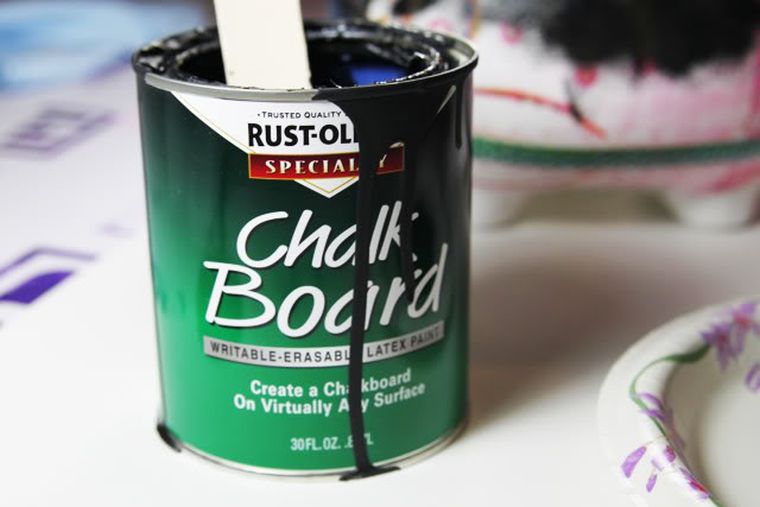 Making an original piggy bank is easy and fun with these 5 projects! | 4/28
The second part of the project is devoted to painting. Before starting, prepare your work plan by covering it with paper or other type of protective equipment. This is an important step, especially if you expect to delegate painting to your child!
View in gallery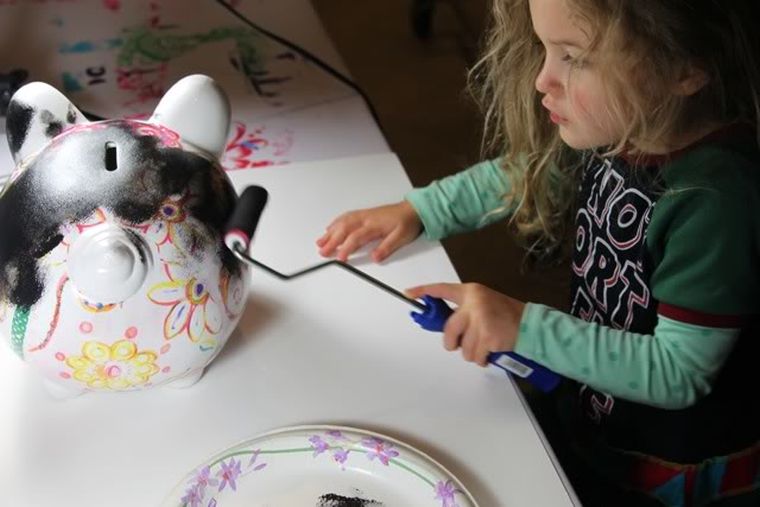 Making an original piggy bank is easy and fun with these 5 projects! | 5/28
The old piggy bank is covered with one or two layers of slate paint. For an optimal result, we make sure that the paint we bought is adapted to the type of surface we are going to paint.
View in gallery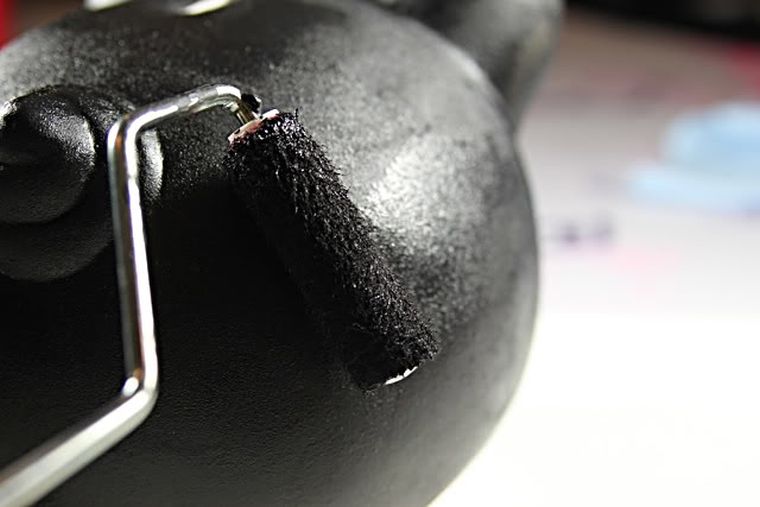 Making an original piggy bank is easy and fun with these 5 projects! | 6/28
Once the surface is painted entirely in slate color, let it dry. Finally, when the piggy bank is completely dry, it is decorated with chalk.
View in gallery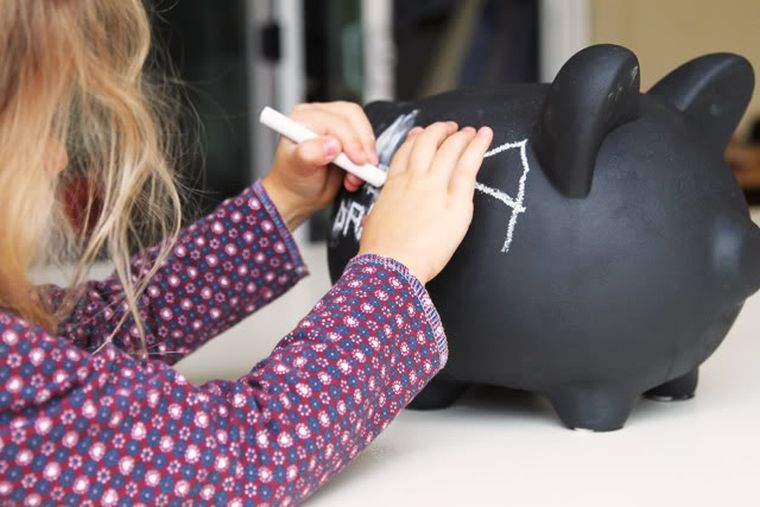 Making an original piggy bank is easy and fun with these 5 projects! | 7/28
And now, your little one already has his own piggy bank original and personalized!
View in gallery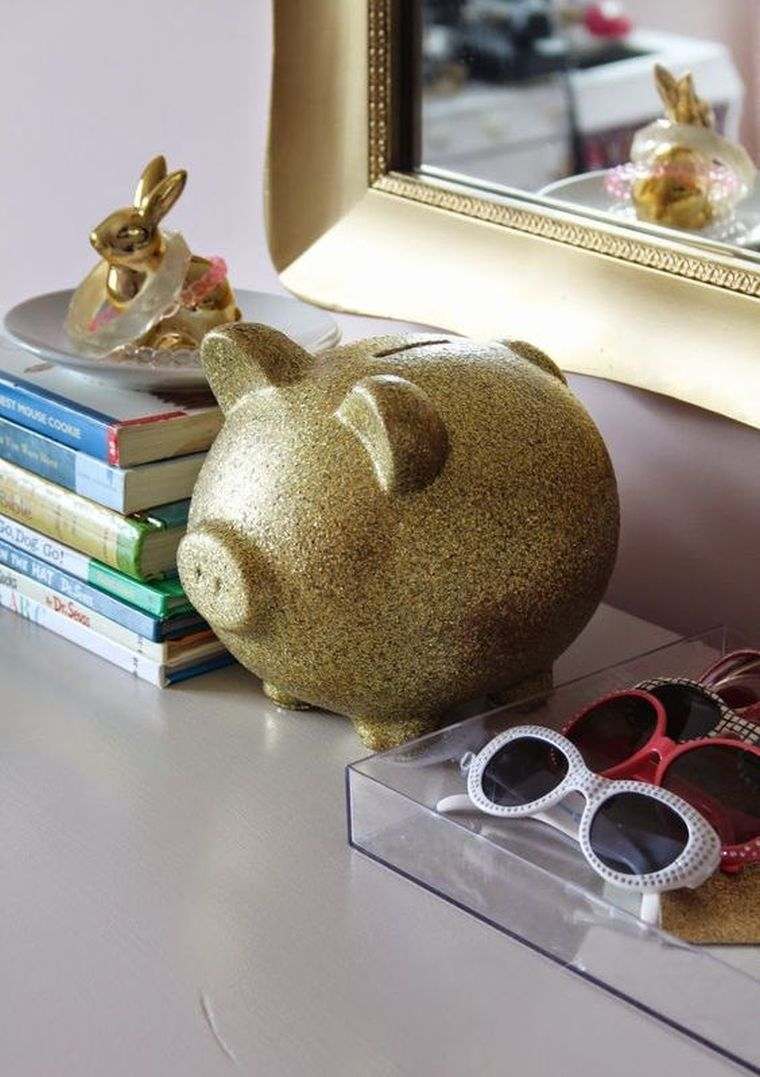 Making an original piggy bank is easy and fun with these 5 projects! | 8/28
Of course, this idea of personalization can be applied also to other forms of piggy banks; we are also free to experiment with different colors of paint. Good idea for those who dream of a decorative object in the shape of silver or gold piggy bank!
Original piggy bank superhero to make from a glass jar
View in gallery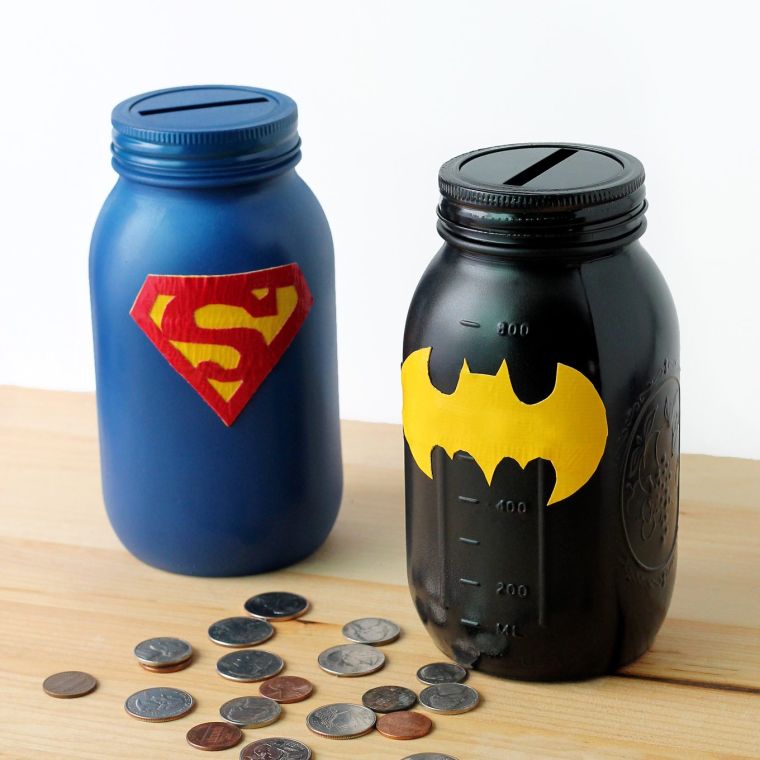 Making an original piggy bank is easy and fun with these 5 projects! | 9/28
Our second idea of manual activity for children also involves painting but in a slightly different form. It’s about creating an original piggy bank from a glass jar. For this, we equip ourselves with the following materials:
- a glass jar
- paint a color of your choice
- a knife
- sticker paper or plain paper and glue
View in gallery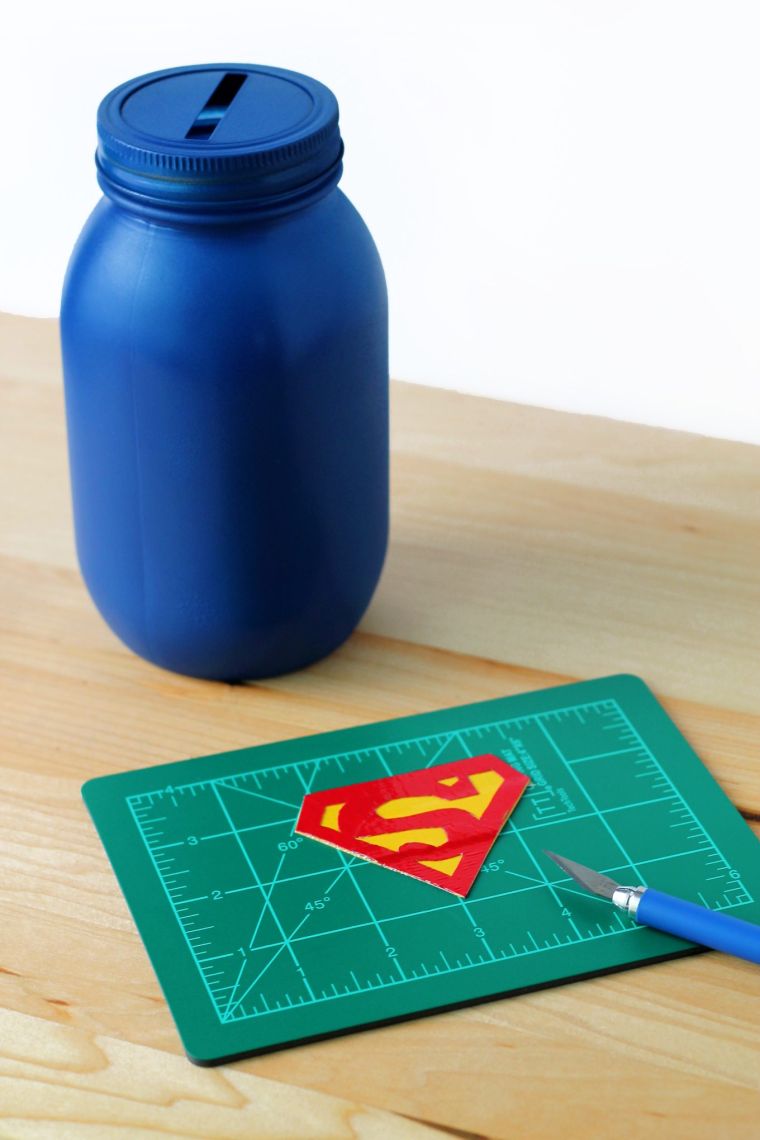 Making an original piggy bank is easy and fun with these 5 projects! | 10/28
After having prepared the materials, one proceeds first of all to the cutting of an opening on the lid of the jar. She will turn the simple glass container into a personalized piggy bank in which her treasures can be hidden. Then we go to painting the jar; we let dry and decorate the DIY piggy bank with a super hero pattern. This is to be printed on self-adhesive paper or on a single sheet, to be fixed on the jar with glue.
View in gallery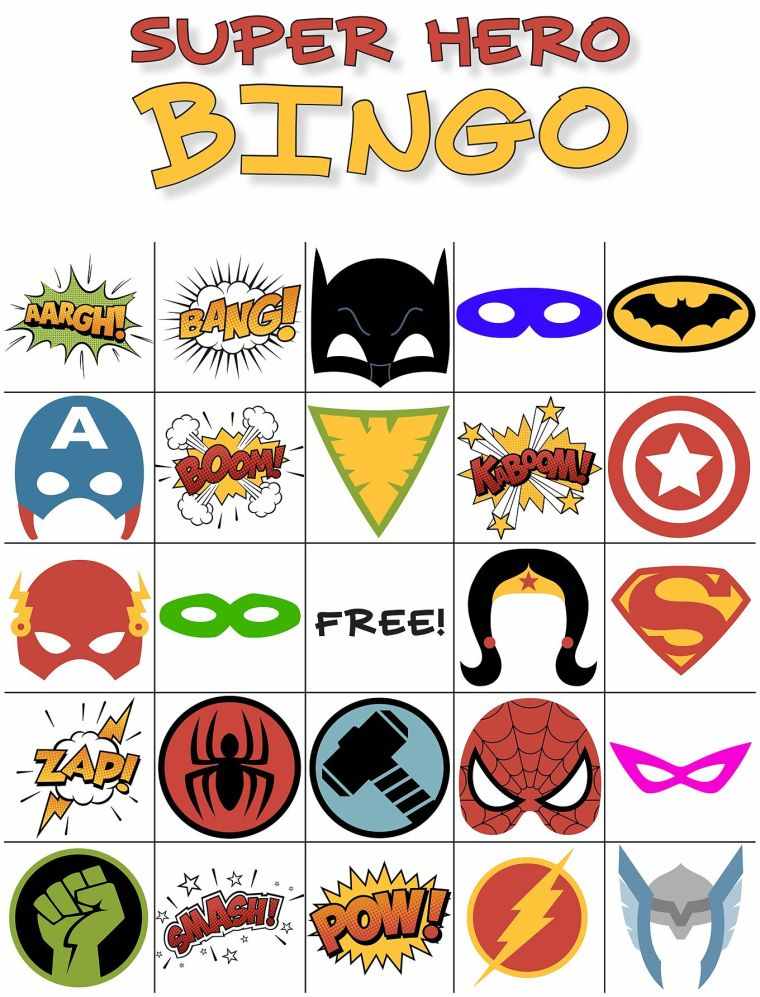 Making an original piggy bank is easy and fun with these 5 projects! | 11/28
On the picture above, some ideas of patterns that can be used to make this decoration. They are made available for free by the blog Fireflies and Mud Pies; so feel free to enjoy it for your creative activity project!
Make an original piggy bank in decorative clay or modeling clay
Did you know that you can also make a personalized piggy bank in decorative clay or modeling clay? The idea is interesting and very creative. The video tutorial above shows how to make such an object inspired by the Starbucks channel. Once we understand the basics of the manufacture of this object, we can decorate it as desired!
Idea of manufacturing original piggy bank in cereal box
View in gallery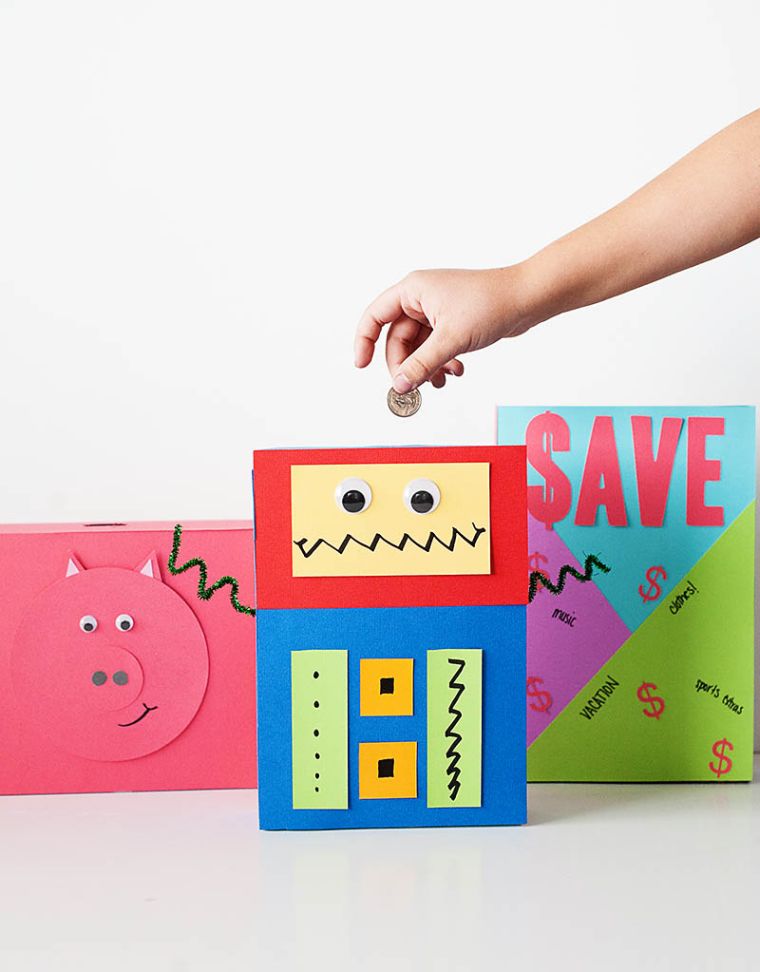 Making an original piggy bank is easy and fun with these 5 projects! | 12/28
The cereal box is an object that we like to recycle in projects of different children’s manual activities. And there is also one to make an original cardboard piggy bank! Here is the list of materials that will be needed for this manual activity:
- a box of cereal ;
- multicolored paper;
- scissors;
- glue ;
- decorative eyes and tail.
View in gallery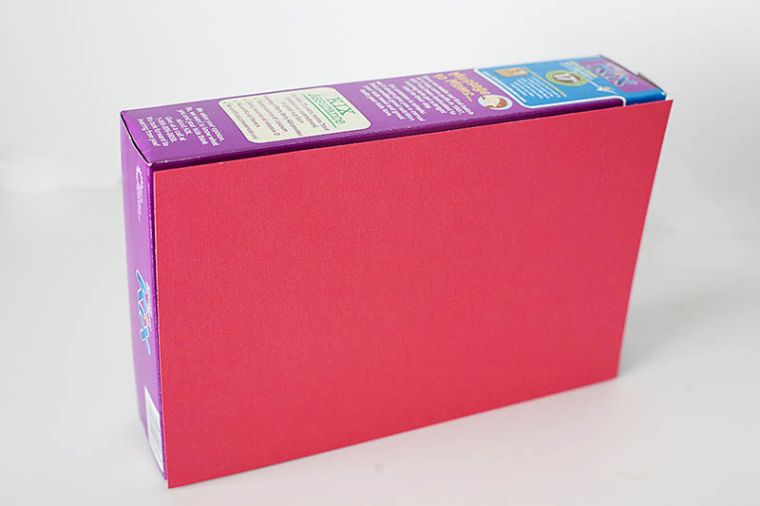 Making an original piggy bank is easy and fun with these 5 projects! | 13/28
The first step in the original piggy bank project is to cover the multicolored paper grain box. The precise nuance will depend on the animal or object one wants to represent. In our example, the chosen animal is a pig and color – a bright shade of pink. One can also decide to paint the box; in this case, several layers of paint should be applied to completely cover the grain cover.
View in gallery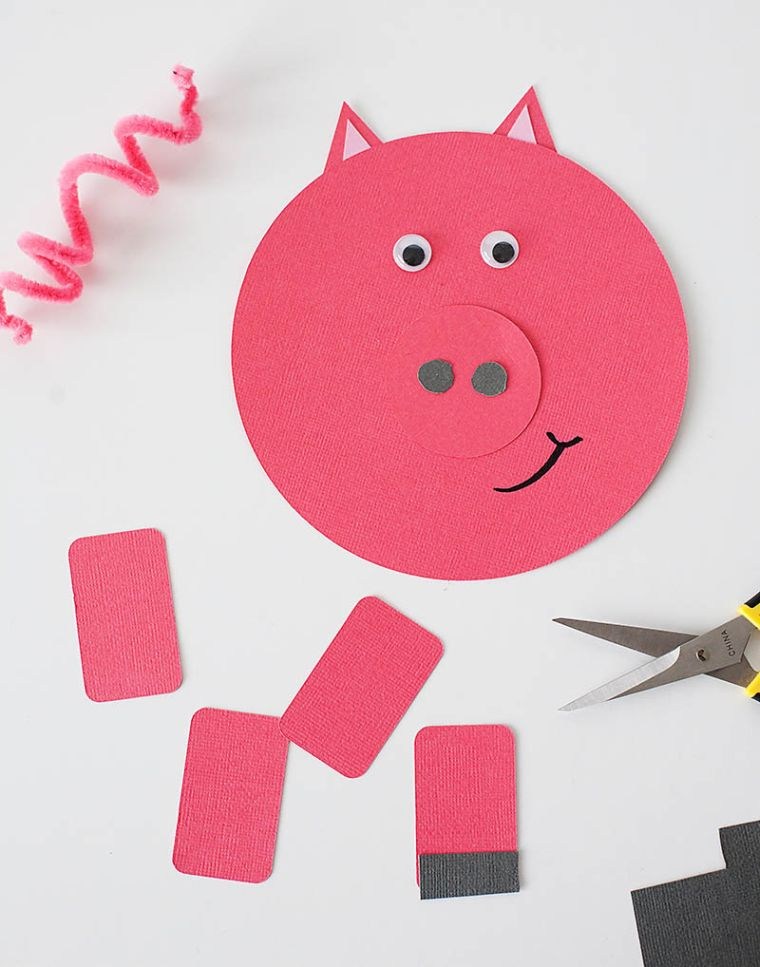
Making an original piggy bank is easy and fun with these 5 projects! | 14/28
The next step depends on the age of the child. For the little ones, the parts of the animal are cut in advance; those who are taller can cut pieces of paper into the desired shape themselves.
View in gallery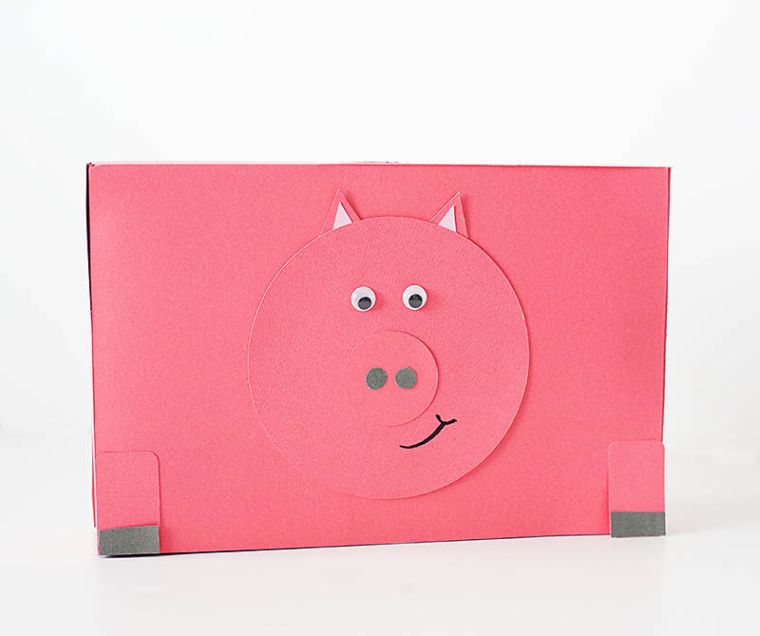 Making an original piggy bank is easy and fun with these 5 projects! | 15/28
Then we go to the next step of sticking the cut pieces on the box. Again, we follow the model of the chosen animal.
View in gallery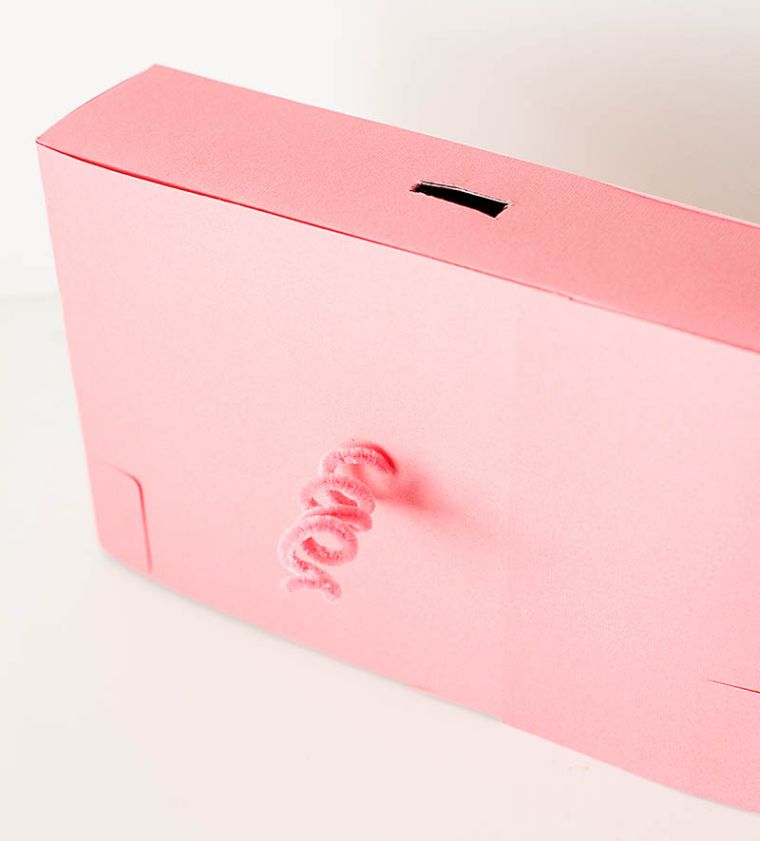 Making an original piggy bank is easy and fun with these 5 projects! | 16/28
Finally, we add the last keys to its creation. A fun tail on the back of the cereal box is a must for a piggy bank. Not to mention a small opening to insert the currency!
Ideas for piggy banks in cereal boxes
View in gallery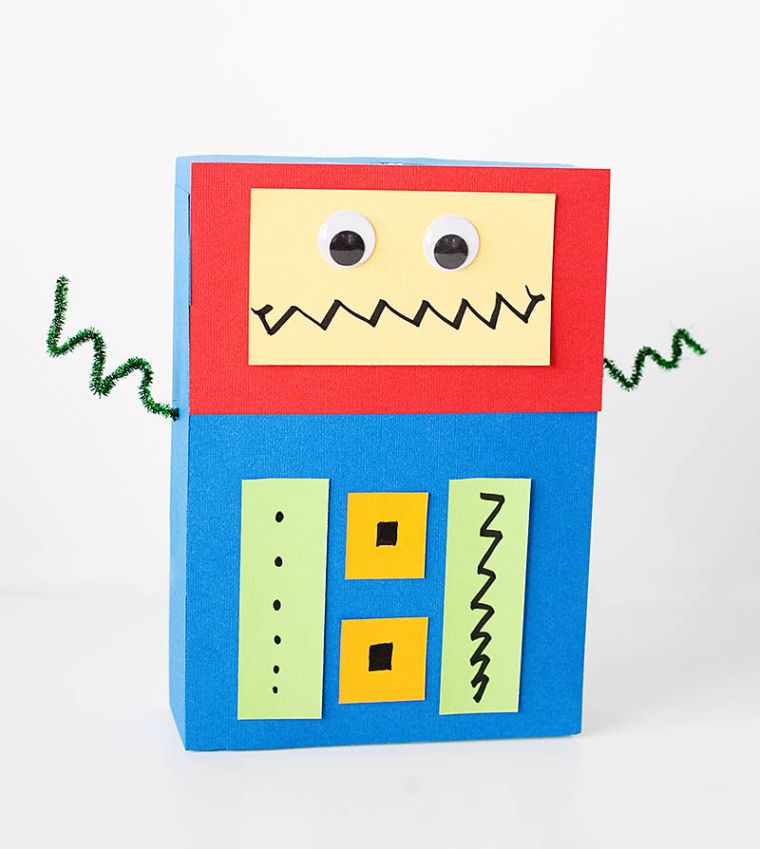 Making an original piggy bank is easy and fun with these 5 projects! | 17/28
Original DIY piggy bank projects adapt to the interests of children. For kids who love technology, you turn a box of cereal into a nice robot. The pieces of colored paper are then used to create buttons and other appropriate decorations.
View in gallery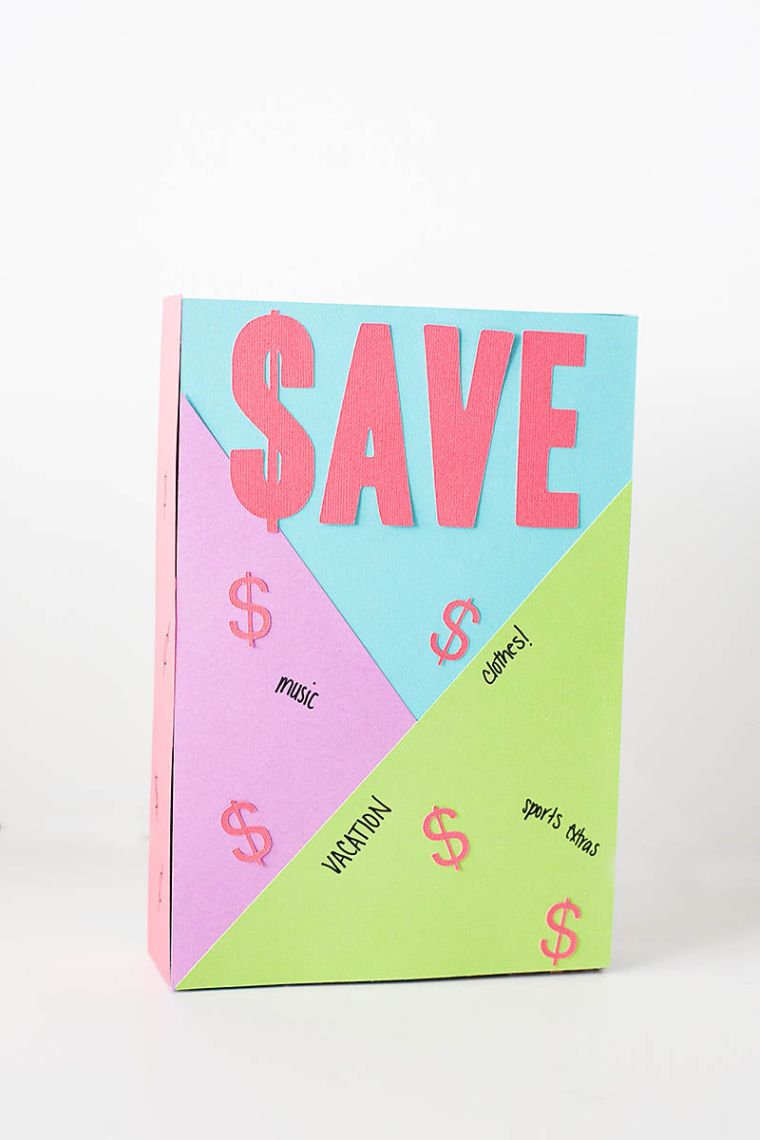 Making an original piggy bank is easy and fun with these 5 projects! | 18/28
For the big ones, we make a paper money box with letters. They can then write a message to further personalize their creation. The messages are to cut out of paper and to stick on the surface or to draw directly on the sheet which will be applied on the box.
Make an original piggy bank in recycled materials
View in gallery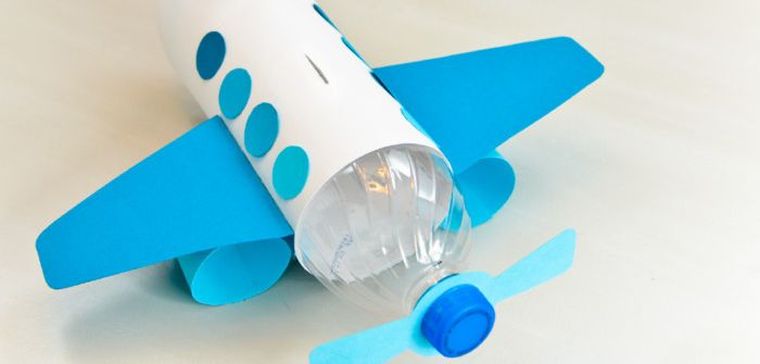 Making an original piggy bank is easy and fun with these 5 projects! | 19/28
Eco-friendly enthusiasts can take advantage of this manual child activity project to teach little ones some good reflexes. Collecting used materials and recycling them in a DIY decoration is trendy and it helps to protect the environment.
View in gallery Making an original piggy bank is easy and fun with these 5 projects! | 20/28
Here is an idea of piggy bank plastic bottle and paper that adopts the shape of an airplane. Propose this project to his son or daughter will require the following materials:
- an empty plastic bottle (large or small, as desired);
- cardboard paper in color (shades of blue, green or other);
- double-sided adhesive;
- scissors;
- a pencil.
View in gallery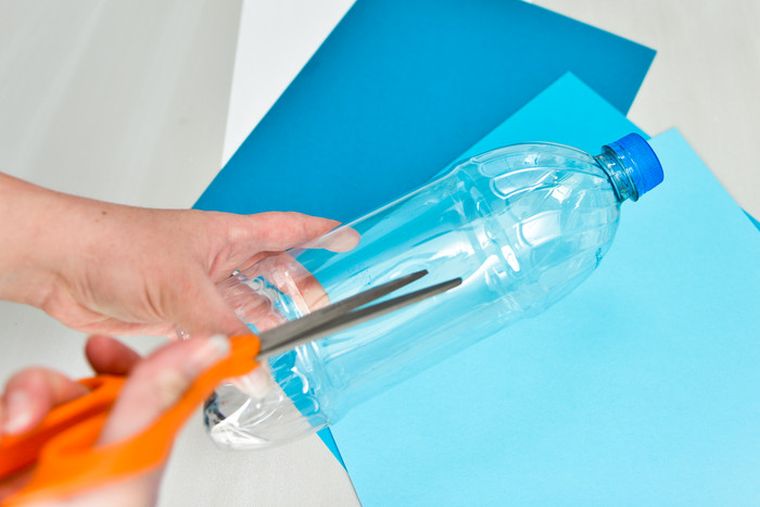 Making an original piggy bank is easy and fun with these 5 projects! | 21/28
Once equipped with the necessary materials, we embark on the project by cutting an opening in the plastic bottle. This opening will be used to slip the currency into the personalized child piggy bank.
View in gallery Making an original piggy bank is easy and fun with these 5 projects! | 22/28
The second step requires a little more attention. It consists in drawing the design of the plane and it is to do with precision. For this, we use cardboard paper and draw on its back pieces that will be used to dress the bottle. For a more precise result, we draw a piece and we use a model for the second one. Then, we cut the second piece.
View in gallery Making an original piggy bank is easy and fun with these 5 projects! | 23/28
We go to the next step during which we fix the dressing of the bottle on its surface. For this purpose, double-sided adhesive is used. It allows us to stick the pieces of paper to the plastic bottle. Attention: the dressing will cover the opening that has already been made. Scissors are used to make coin opening accessible.
How to customize your original piggy bank in the shape of an airplane
View in gallery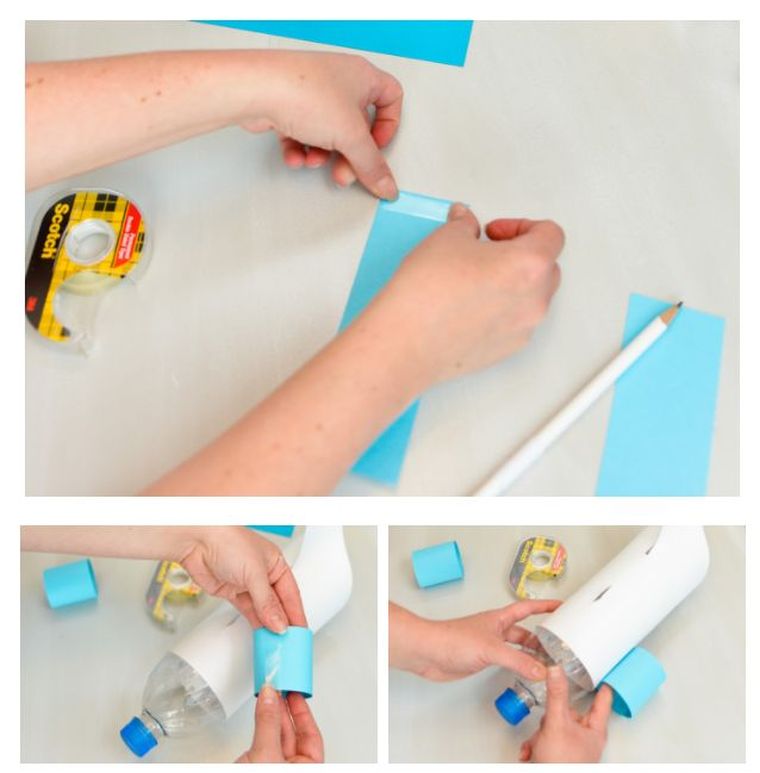 Making an original piggy bank is easy and fun with these 5 projects! | 24/28
Then we draw and cut the two engines of his plane. For this, we make two rectangular pieces of paper that are wrapped and glued together. Then, they are fixed on the plastic bottle using the adhesive. Good to know: the engines thus produced will help the aircraft to remain stable when placed on a flat surface.
View in gallery Making an original piggy bank is easy and fun with these 5 projects! | 25/28
For the next step, we draw and cut the two wings of the plane. Again, we proceed using one of the model wings of the other. This little trick will make both parts of the plane identical.
View in gallery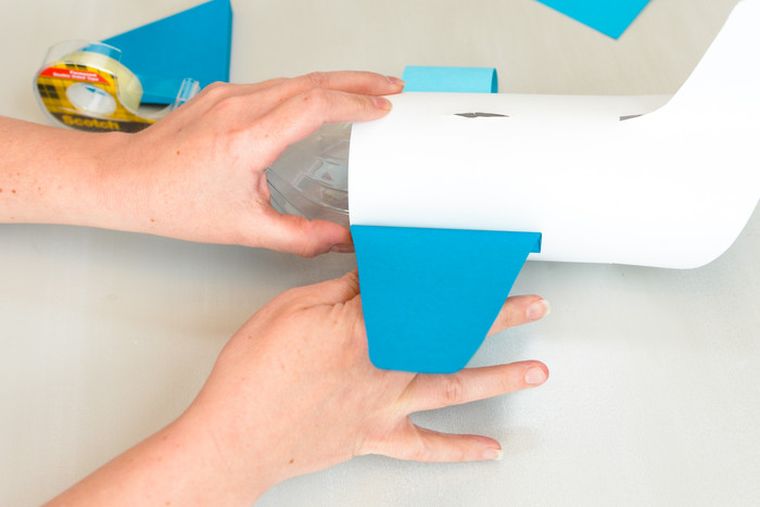 Making an original piggy bank is easy and fun with these 5 projects! | 26/28
The wings thus cut are to stick on the original piggy bank with the double-sided tape. We finish by drawing the propeller of the plane. It will then be fixed between the opening of the bottle and its cap; for this reason, it would be best to use the latter as a model. Finally, all you have to do is add decorative touches to your personalized piggy bank!
View in gallery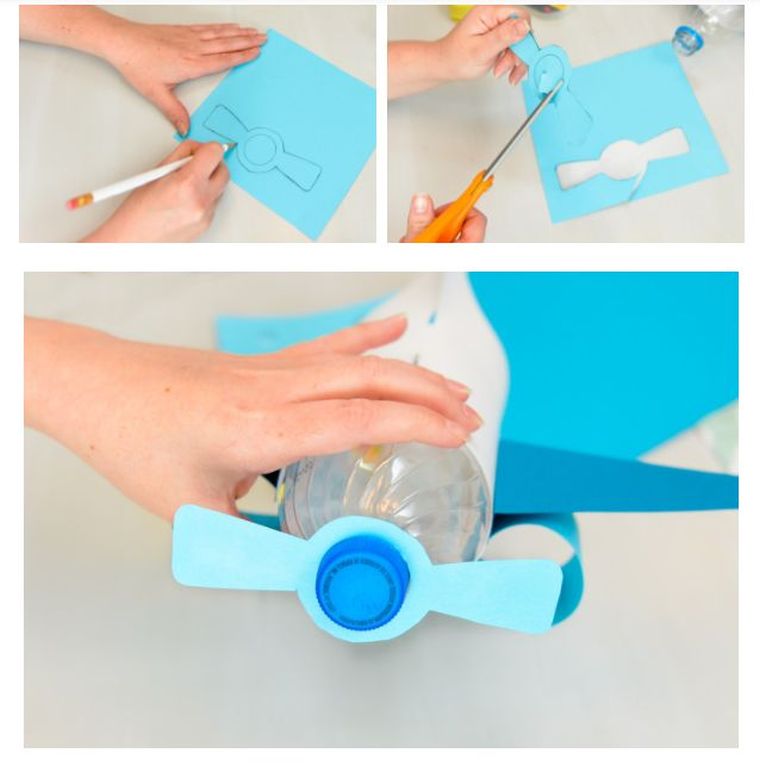 Making an original piggy bank is easy and fun with these 5 projects! | 27/28
View in galleryMaking an original piggy bank is easy and fun with these 5 projects! | 28/28
Claire Deschamps in